|
|
|
|
|
|
|
|
Creating Maps
This page contains information to help you create maps in MapTube.
Help Displaying Maps is covered in a different section.
Overview MapTube can make maps from CSV files containing a column of geospatial references, shapefiles, or KML files. In the case of KML files, these need to be stored on a 3rd party web server and MapTube simply adds them as an overlay using this link to the URL. Where the data is stored as a CSV file, or a shapefile, these can be uploaded to MapTube's DataDrop and used for making more complex maps. Here, a single column, or field of data, is used for visualisation. This is chosen in the user interface for styling maps, along with the colour scale and data breaks used to visualise the data. The benefit of uploading a map to MapTube is in searching and comparing related data using the search facility. For example, 'London' could be entered as a keyword and maps of population density and transport links selected for viewing. These two layers are then automatically displayed on a Google Map, allowing them to be compared visually using the fade in and out function.
Quickstart - How to Create a Map
Before Creating Maps - Create an Account A MapTube account is required to create maps, which can be created from the 'login' page. Setting up an account requires a valid email address because an activation code is sent by email. The account cannot be used until the link in the email is visited and the activation code verified. Account creation is fully automatic, so this can be completed in a few minutes.
Map Creation Procedure
|
||||||
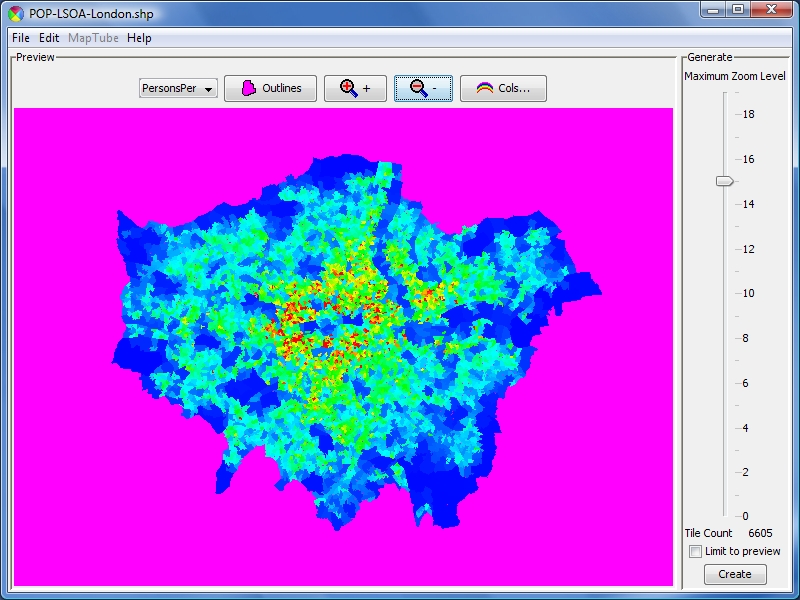
Use the Google Map Creator tool to create the map from a shapefile, making sure to save the settings.
|
||||||
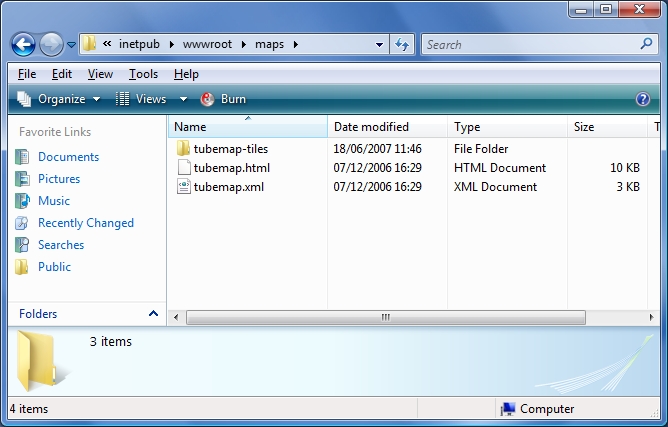
With the tile directory and settings file on the local disk, copy both to a web server where they will be accessible to the public.
The example map above is made up of three parts:
NOTE: The Google Map Creator also creates a '.gif' file containing the UCL logo which is referenced in the '.html' file. This has been omitted from the directory listing above for the sake of clarity and is unnecessary when importing maps into MapTube.
|
||||||
Log in to your account and go to the create maps page.
|
||||||
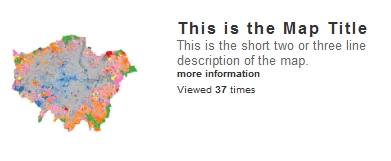
Enter the url of the settings file into the "XML URL" box and click the "Test" button. In the example in step 2, this would be "http://www.myserver.co.uk/maps/tubemap.xml". If all went well, then the map should be visible on the right hand side of the screen. If the map did not appear successfully then it is likely that the URL to the XML settings file is wrong. Open up a browser window and copy the URL into the browser's location window. You should be able to see what's in the settings file. Also check that the directory containing the map tiles is in the same location as the settings file. There should be a settings ".xml" file and a directory called "mymapname-tiles". The map title box should be filled in automatically from the settings file. This can be changed if necessary. The keywords box contains space separated keywords which are used when searching for maps. Enter some keywords into the box that will allow you to search for this map in the future e.g. "1996 air pollution roadside london". Then the map will be found by searching for the keywords "1996", "pollution" or "london". The next required field is the description field, which needs to contain a short description of the map used with the icon to identify the map when searching and browsing. This field is also searched for keywords on the search page.
The final field is the information field, which is used for more detailed information about how the map was made and what it shows. This is intended to be a one page description and is accessible by clicking on the 'more information' link under the map description (see figure above).
|
||||||
If the map and colour scale are visible and all the required fields have been entered then the "Submit" button will be enabled. When this is clicked, a link to the map will be created. This should happen relatively quickly and the page change to show that the upload was successful. |
||||||
Additional Information Maptube only takes a link to the map on your web server, so it is important that the map remains in the same place and is accessible. Only the creator of the map can edit or delete the map reference, which is done through the "manage" page. This allows you to edit the title, keywords, description and information, or to delete the reference to the map completely. After a map has been successfully created, only the '-tiles' directory need remain on the server. Everything else can be deleted. |
||||||
Centre for Advanced Spatial Analysis - University College London - 1st Floor - 90 Tottenham Court Road - London - W1T 4TJ - ![]() +44 (0)20 3108 3902 - Email support@casa.ucl.ac.uk
Copyright © 1999-2021 UCL
+44 (0)20 3108 3902 - Email support@casa.ucl.ac.uk
Copyright © 1999-2021 UCL